今回はローカルで、アプリケーションを作成する手順のまとめです。
※rubyのインストール等は終わってる前提です。インストール手順などの詳細は
こちらを参考にしてください。
まずはRailsのインストール
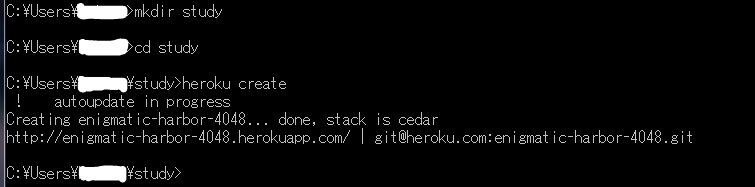
適当なディレクトリを作成します。
$ mkdir rails
で、作成したディレクトリに移動します。
$ cd rails
そこにrailsをインストールします。
$ gem install rails
以下のようにいろいろ必要なものをインストールしてくれます。
gem install rails
Fetching: i18n-0.6.1.gem (100%)
Fetching: activesupport-3.2.8.gem (100%)
Fetching: builder-3.0.3.gem (100%)
Fetching: activemodel-3.2.8.gem (100%)
Fetching: rack-1.4.1.gem (100%)
Fetching: rack-cache-1.2.gem (100%)
Fetching: rack-test-0.6.1.gem (100%)
Fetching: journey-1.0.4.gem (100%)
Fetching: hike-1.2.1.gem (100%)
Fetching: tilt-1.3.3.gem (100%)
Fetching: sprockets-2.1.3.gem (100%)
Fetching: erubis-2.7.0.gem (100%)
Fetching: actionpack-3.2.8.gem (100%)
Fetching: arel-3.0.2.gem (100%)
Fetching: tzinfo-0.3.33.gem (100%)
Fetching: activerecord-3.2.8.gem (100%)
Fetching: activeresource-3.2.8.gem (100%)
Fetching: polyglot-0.3.3.gem (100%)
Fetching: treetop-1.4.10.gem (100%)
Fetching: mail-2.4.4.gem (100%)
Fetching: actionmailer-3.2.8.gem (100%)
Fetching: rack-ssl-1.3.2.gem (100%)
Fetching: thor-0.16.0.gem (100%)
Fetching: json-1.7.5.gem (100%)
Building native extensions. This could take a while...
Fetching: rdoc-3.12.gem (100%)
Depending on your version of ruby, you may need to install ruby rdoc/ri data:
<= 1.8.6 : unsupported
= 1.8.7 : gem install rdoc-data; rdoc-data --install
= 1.9.1 : gem install rdoc-data; rdoc-data --install
>= 1.9.2 : nothing to do! Yay!
Fetching: railties-3.2.8.gem (100%)
Fetching: rails-3.2.8.gem (100%)
Successfully installed i18n-0.6.1
Successfully installed activesupport-3.2.8
Successfully installed builder-3.0.3
Successfully installed activemodel-3.2.8
Successfully installed rack-1.4.1
Successfully installed rack-cache-1.2
Successfully installed rack-test-0.6.1
Successfully installed journey-1.0.4
Successfully installed hike-1.2.1
Successfully installed tilt-1.3.3
Successfully installed sprockets-2.1.3
Successfully installed erubis-2.7.0
Successfully installed actionpack-3.2.8
Successfully installed arel-3.0.2
Successfully installed tzinfo-0.3.33
Successfully installed activerecord-3.2.8
Successfully installed activeresource-3.2.8
Successfully installed polyglot-0.3.3
Successfully installed treetop-1.4.10
Successfully installed mail-2.4.4
Successfully installed actionmailer-3.2.8
Successfully installed rack-ssl-1.3.2
Successfully installed thor-0.16.0
Successfully installed json-1.7.5
Successfully installed rdoc-3.12
Successfully installed railties-3.2.8
Successfully installed rails-3.2.8
27 gems installed
Installing ri documentation for i18n-0.6.1...
Installing ri documentation for activesupport-3.2.8...
Installing ri documentation for builder-3.0.3...
Installing ri documentation for activemodel-3.2.8...
Installing ri documentation for rack-1.4.1...
Installing ri documentation for rack-cache-1.2...
Installing ri documentation for rack-test-0.6.1...
Installing ri documentation for journey-1.0.4...
Installing ri documentation for hike-1.2.1...
Installing ri documentation for tilt-1.3.3...
Installing ri documentation for sprockets-2.1.3...
Installing ri documentation for erubis-2.7.0...
Installing ri documentation for actionpack-3.2.8...
Installing ri documentation for arel-3.0.2...
Installing ri documentation for tzinfo-0.3.33...
Installing ri documentation for activerecord-3.2.8...
Installing ri documentation for activeresource-3.2.8...
Installing ri documentation for polyglot-0.3.3...
Installing ri documentation for treetop-1.4.10...
Installing ri documentation for mail-2.4.4...
Installing ri documentation for actionmailer-3.2.8...
Installing ri documentation for rack-ssl-1.3.2...
Installing ri documentation for thor-0.16.0...
Installing ri documentation for json-1.7.5...
Installing ri documentation for rdoc-3.12...
Installing ri documentation for railties-3.2.8...
Installing ri documentation for rails-3.2.8...
Installing RDoc documentation for i18n-0.6.1...
Installing RDoc documentation for activesupport-3.2.8...
Installing RDoc documentation for builder-3.0.3...
Installing RDoc documentation for activemodel-3.2.8...
Installing RDoc documentation for rack-1.4.1...
Installing RDoc documentation for rack-cache-1.2...
Installing RDoc documentation for rack-test-0.6.1...
Installing RDoc documentation for journey-1.0.4...
Installing RDoc documentation for hike-1.2.1...
Installing RDoc documentation for tilt-1.3.3...
Installing RDoc documentation for sprockets-2.1.3...
Installing RDoc documentation for erubis-2.7.0...
Installing RDoc documentation for actionpack-3.2.8...
Installing RDoc documentation for arel-3.0.2...
Installing RDoc documentation for tzinfo-0.3.33...
Installing RDoc documentation for activerecord-3.2.8...
Installing RDoc documentation for activeresource-3.2.8...
Installing RDoc documentation for polyglot-0.3.3...
Installing RDoc documentation for treetop-1.4.10...
Installing RDoc documentation for mail-2.4.4...
Installing RDoc documentation for actionmailer-3.2.8...
Installing RDoc documentation for rack-ssl-1.3.2...
Installing RDoc documentation for thor-0.16.0...
Installing RDoc documentation for json-1.7.5...
Installing RDoc documentation for rdoc-3.12...
Installing RDoc documentation for railties-3.2.8...
Installing RDoc documentation for rails-3.2.8...
これでインストールは完了。
※インストールするrailsのバージョンを指定したい場合は、
gem install rails --version "~> 3.2.1" --no-rdoc --no-ri
のコマンドを叩くと良いです。
アプリケーションを作成する
アプリケーションを作成します。
$ rails new study --skip-bundle
rails newコマンドで、『study』ディレクトリを作成して、Railsアプリケーションに必要なフォルダやファイルを作ってくれます。
create
create README.rdoc
create Rakefile
create config.ru
create .gitignore
create Gemfile
create app
create app/assets/images/rails.png
create app/assets/javascripts/application.js
create app/assets/stylesheets/application.css
create app/controllers/application_controller.rb
create app/helpers/application_helper.rb
create app/mailers
create app/models
create app/views/layouts/application.html.erb
create app/mailers/.gitkeep
create app/models/.gitkeep
create config
create config/routes.rb
create config/application.rb
create config/environment.rb
create config/environments
create config/environments/development.rb
create config/environments/production.rb
create config/environments/test.rb
create config/initializers
create config/initializers/backtrace_silencers.rb
create config/initializers/inflections.rb
create config/initializers/mime_types.rb
create config/initializers/secret_token.rb
create config/initializers/session_store.rb
create config/initializers/wrap_parameters.rb
create config/locales
create config/locales/en.yml
create config/boot.rb
create config/database.yml
create db
create db/seeds.rb
create doc
create doc/README_FOR_APP
create lib
create lib/tasks
create lib/tasks/.gitkeep
create lib/assets
create lib/assets/.gitkeep
create log
create log/.gitkeep
create public
create public/404.html
create public/422.html
create public/500.html
create public/favicon.ico
create public/index.html
create public/robots.txt
create script
create script/rails
create test/fixtures
create test/fixtures/.gitkeep
create test/functional
create test/functional/.gitkeep
create test/integration
create test/integration/.gitkeep
create test/unit
create test/unit/.gitkeep
create test/performance/browsing_test.rb
create test/test_helper.rb
create tmp/cache
create tmp/cache/assets
create vendor/assets/javascripts
create vendor/assets/javascripts/.gitkeep
create vendor/assets/stylesheets
create vendor/assets/stylesheets/.gitkeep
create vendor/plugins
create vendor/plugins/.gitkeep
『--skip-bundle』オプションをつけているのは、『bundle install』の実行を省略するためです。オプションを付けないと、『bundle install』が自動実行されます。
次にBundlerでGemパッケージを追加します。
$ cd study
$ bundle install
Fetching gem metadata from https://rubygems.org/.........
Using rake (0.9.2.2)
Using i18n (0.6.1)
Using multi_json (1.3.6)
Using activesupport (3.2.8)
Using builder (3.0.3)
Using activemodel (3.2.8)
Using erubis (2.7.0)
Using journey (1.0.4)
Using rack (1.4.1)
Using rack-cache (1.2)
Using rack-test (0.6.1)
Using hike (1.2.1)
Using tilt (1.3.3)
Using sprockets (2.1.3)
Using actionpack (3.2.8)
Using mime-types (1.19)
Using polyglot (0.3.3)
Using treetop (1.4.10)
Using mail (2.4.4)
Using actionmailer (3.2.8)
Using arel (3.0.2)
Using tzinfo (0.3.33)
Using activerecord (3.2.8)
Using activeresource (3.2.8)
Using bundler (1.2.0)
Installing coffee-script-source (1.3.3)
Installing execjs (1.4.0)
Installing coffee-script (2.2.0)
Using rack-ssl (1.3.2)
Using json (1.7.5)
Using rdoc (3.12)
Using thor (0.16.0)
Using railties (3.2.8)
Installing coffee-rails (3.2.2)
Installing jquery-rails (2.1.2)
Using rails (3.2.8)
Installing sass (3.2.1)
Installing sass-rails (3.2.5)
Installing sqlite3 (1.3.6) with native extensions
Installing uglifier (1.3.0)
Your bundle is complete! Use `bundle show [gemname]` to see where a bundled gem is installed.
これでインストール完了。
SQLite3とかいろいろ必要なパッケージがインストールされました。
アプリケーションを起動する
先ほど作ったアプリケーションのフォルダに移動して、サーバを起動します。
Rubyに付属されているWEBrickというウェブサーバが起動されます。
$ rails server
=> Booting WEBrick
=> Rails 3.2.8 application starting in development on http://0.0.0.0:3000
=> Call with -d to detach
=> Ctrl-C to shutdown server
[2012-09-24 07:52:41] INFO WEBrick 1.3.1
[2012-09-24 07:52:41] INFO ruby 1.9.3 (2012-04-20) [x86_64-darwin11.4.0]
[2012-09-24 07:52:41] INFO WEBrick::HTTPServer#start: pid=57972 port=3000
Started GET "/assets/rails.png" for 127.0.0.1 at 2012-09-24 07:52:54 +0900
Connecting to database specified by database.yml
Served asset /rails.png - 200 OK (9ms)
これで起動しました。
ブラウザを上げて、『http://localhost:3000』にアクセスしてみましょう。
以下のような画面が出ればOK
終了する場合は、『control』+『c』で終わります。
アプリケーションの構成を見てみる
Macでアプリケーションを作成すると、こんな感じ。
いろいろとフォルダができますが、各フォルダの役割は簡単に言うとこんな感じ。
app モデル、ビュー、コントローラのコードを置く
config ルーティングやデータベースなどの設定ファイルを置く
db マイグレーションスクリプトやシードデータを置く
doc 開発者向けのドキュメントを置く
lib 自作ライブラリやrakeファイルを置く
log ログが出力される
public アプリケーションを介さずに、静的ファイルを置く
script スクリプトファイルを置く
test テストケースを書いたテストファイルを置く
tmp キャッシュなどのテンポラリファイル
vender プラグインなどは配置する
appフォルダの下にもフォルダが分かれており、それぞれに役割があります。
appの下にはファイル名規約があるので、次のサイトを参考にしましょう。
(参考:
Railsドキュメント Railsの基礎知識)
コントローラとアクションの作成
ようやくコーディングっぽいところに到達(笑)
Railsの初期画面だと味気ないので、コントローラを作成します。
コンソールに戻って、『rails generate コントローラ名 アクション名』コマンドを実行します。
generateは省略もできて、『rails g 〜』とも書けるようです。
まあ、ともかくコマンド実行しましょう。
$ rails g controller top index
create app/controllers/top_controller.rb
route get "top/index"
invoke erb
create app/views/top
create app/views/top/index.html.erb
invoke test_unit
create test/functional/top_controller_test.rb
invoke helper
create app/helpers/top_helper.rb
invoke test_unit
create test/unit/helpers/top_helper_test.rb
invoke assets
invoke coffee
create app/assets/javascripts/top.js.coffee
invoke scss
create app/assets/stylesheets/top.css.scss
TopControllerとindexアクションがこれで作成されました。
実際にファイルを見てみましょうー。
app/controllers/top_controller.rb
TopControllerクラスの中に、indexメソッドができてます。
これが、トップページを表示するアクションになります。
次に、ルーティングの設定をします。
config/route.rb を開いて、以下のように書き換えます。
書き換えたら、public/index.htmlファイルを削除します。
これを消さないと、また同じ画面が表示されることに!!
最後に、ローカルサーバを起動します。
rails server
以下のように表示されればOK!!
ビューを作成する
次に、indexアクションに対応するテンプレートを編集します。
先ほどの画面を表示していたHTMLですね。
Railsのビューのためのテンプレートは、『アクション名』+『.html』+『.erb』というファイル名になります。(HTMLの場合は)
/app/view/top/index.html.erb を開いて、以下のように修正します。
ブラウザを再読み込みすると、表示が変わってますね。
変数を表示する
ベタ書きだとつまらんので、変数を使ってみます。
/app/controller/top_controller.rb
@messageを定義して、文字を代入します。
テンプレートの方もmessageを読み込むように修正します。変数をテンプレートで読み込む場合は、<%= %>で変数を囲むんですな。
ブラウザをリロードするとこんな感じ。
以上、アプリケーション作成入門でした!